Introduction
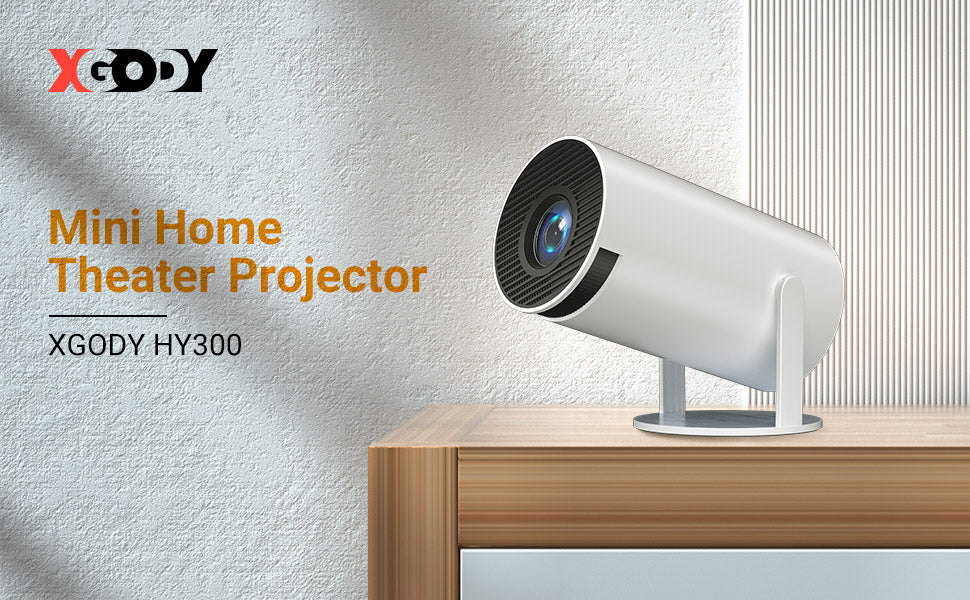
Overview of the HY 300 Projector
The HY 300 Projector is a cutting-edge multimedia device designed to elevate your viewing experience with its advanced features and impressive performance. From vibrant image quality to versatile connectivity options, this projector offers a multitude of benefits for both personal and professional use.
Importance of the User Manual
While the HY 300 Projector boasts intuitive operation, the user manual serves as a comprehensive guide to unlock its full potential. Whether you're setting up the projector for the first time or exploring its advanced functions, the user manual provides valuable insights and instructions to ensure a seamless experience.
Getting Started
Unboxing the HY 300 Projector
Upon unboxing the HY 300 Projector, you'll discover a well-packaged device accompanied by essential accessories such as a power cable, remote control, and user manual. Take care to inspect each component for any signs of damage during transit.
Familiarizing Yourself with the Components
Before diving into setup, take a moment to familiarize yourself with the various components of the HY 300 Projector. From the lens and control panel to the input/output ports and ventilation vents, understanding each part will streamline the setup process.
Setting Up the Projector
Choosing the Right Location
Selecting the optimal location for your HY 300 Projector is crucial for achieving the best viewing experience. Consider factors such as ambient light, screen size, and viewing angle when determining the placement of the projector.
Connecting the Power Supply
Begin the setup process by connecting the power supply to the HY 300 Projector and ensuring a stable power source. Use the provided power cable and plug it into a compatible power outlet, taking care to avoid overloading electrical circuits.
Adjusting Focus and Keystone Correction
Once the projector is powered on, adjust the focus and keystone correction settings to optimize image clarity and alignment. Use the focus ring to sharpen the image, and utilize keystone correction to correct any distortion caused by projecting at an angle.
Navigating the User Interface
Understanding the Control Panel
The control panel of the HY 300 Projector houses essential buttons for navigating menus, adjusting settings, and controlling playback. Familiarize yourself with the layout and functions of each button to streamline operation.
Exploring Menu Options and Settings
Dive into the menu options of the HY 300 Projector to customize settings according to your preferences. From display settings to audio preferences and input/output configurations, the menu offers a range of adjustments to enhance your viewing experience.
Input and Output Connections
Connecting External Devices
Take advantage of the versatile input options of the HY 300 Projector to connect external devices such as laptops, gaming consoles, Blu-ray players, and more. Utilize HDMI, VGA, USB, and audio ports to establish seamless connectivity.
Understanding Input and Output Ports
Gain a comprehensive understanding of the input and output ports available on the HY 300 Projector. From HDMI and USB to audio and video ports, each port serves a specific purpose and accommodates different devices and connections.
Adjusting Display Settings
Selecting Display Mode
Tailor the display mode of the HY 300 Projector to suit your viewing environment and preferences. Choose from various preset modes such as cinema, standard, vivid, and custom to achieve the desired color balance and brightness.
Adjusting Brightness, Contrast, and Color Temperature
Fine-tune the brightness, contrast, and color temperature settings of the projector to achieve optimal image quality. Balancing these parameters ensures vibrant colors, deep blacks, and sharp details in your projected images and videos.
Using the Remote Control
Functionality and Key Features
The remote control of the HY 300 Projector provides convenient access to essential functions and features. From adjusting volume and navigating menus to controlling playback and switching input sources, the remote streamlines operation.
Troubleshooting Remote Control Issues
In the event of remote control issues such as unresponsiveness or malfunction, troubleshoot the device by checking the battery, ensuring line-of-sight communication with the projector, and resetting the remote if necessary.
Projection Methods
Front Projection vs. Rear Projection
Understand the differences between front projection and rear projection methods when setting up the HY 300 Projector. Front projection is ideal for traditional setups, while rear projection offers unique advantages such as space-saving and enhanced aesthetics.
Ceiling Mounting Considerations
Explore the option of ceiling mounting the HY 300 Projector for a streamlined and space-efficient setup. Consider factors such as ceiling height, projector orientation, and cable management when planning the installation process.
Optimizing Image Quality
Adjusting Projection Distance
Experiment with different projection distances to find the optimal size and aspect ratio for your viewing area. The HY 300 Projector offers flexibility in projection distance, allowing you to achieve the desired screen size without compromising image quality.
Ensuring Proper Screen Alignment
Ensure proper screen alignment by positioning the projector perpendicular to the screen and adjusting the lens shift and zoom settings as needed. Proper alignment eliminates distortion and ensures uniform brightness and focus across the entire screen.
Audio Settings and Output
Adjusting Volume Levels
Fine-tune the volume levels of the HY 300 Projector to achieve optimal audio clarity and balance. Whether you're watching movies, playing games, or giving presentations, adjusting the volume ensures an immersive audio experience.
Connecting External Speakers
Enhance the audio capabilities of the HY 300 Projector by connecting external speakers or sound systems. Utilize the audio output ports to establish a seamless audio setup and enjoy enhanced sound quality for your multimedia content.
Advanced Features and Functions
Keystone Correction
Take advantage of keystone correction to correct image distortion caused by projecting at an angle. The HY 300 Projector offers manual keystone adjustment options to ensure a perfectly squared image, even in challenging projection environments.
Image Flip and Rotation
Explore the image flip and rotation features of the HY 300 Projector for versatile projection setups. Whether you need to flip the image for ceiling-mounted installations or rotate it for portrait orientation, these advanced functions offer flexibility in projection options.
Maintenance and Care
Cleaning the Projector Lens
Maintain optimal image quality by regularly cleaning the lens of the HY 300 Projector. Use a soft, lint-free cloth to gently wipe away dust and smudges, taking care to avoid scratching the lens surface.
Replacing the Lamp
Monitor the lamp life of the HY 300 Projector and replace the lamp when necessary to ensure consistent brightness and performance. Follow the manufacturer's guidelines and safety precautions when replacing the lamp to avoid damage to the projector.
Troubleshooting Common Issues
No Power or No Image Display
Troubleshoot common issues such as no power or no image display on the HY 300 Projector. Check the power supply, connections, and settings to identify and resolve the underlying cause of the problem.
Poor Image Quality or Connectivity Issues
Address poor image quality or connectivity issues by troubleshooting the projector settings and connections. Adjust display settings, ensure proper input/output connections, and verify compatibility with external devices to improve performance.
Updating Firmware
Importance of Firmware Updates
Stay up to date with the latest features and improvements by updating the firmware of the HY 300 Projector regularly. Firmware updates address software bugs, enhance compatibility, and introduce new features to enhance your user experience.
Steps to Update Firmware
Follow the manufacturer's instructions to update the firmware of the HY 300 Projector safely and efficiently. Typically, firmware updates can be performed via USB or network connection, and the process may vary depending on the specific model of the projector.
Safety Precautions
Handling and Storage Guidelines
Adhere to safety precautions when handling and storing the HY 300 Projector to prevent damage and ensure longevity. Avoid exposing the projector to extreme temperatures, moisture, or physical shocks that may compromise its performance.
Avoiding Overheating and Electrical Hazards
Take precautions to prevent overheating and electrical hazards when using the HY 300 Projector. Ensure proper ventilation around the projector, avoid blocking air intake vents, and use compatible power sources to minimize the risk of electrical issues.
Product Specifications
Technical Specifications of the HY 300 Projector
Familiarize yourself with the technical specifications of the HY 300 Projector to better understand its capabilities and limitations. Key specifications include resolution, brightness, contrast ratio, lamp life, and compatibility with external devices.
Understanding Compatibility and Requirements
Verify compatibility with your existing setup and requirements before purchasing the HY 300 Projector. Ensure compatibility with your media devices, screen size preferences, and installation environment to achieve optimal performance.
Warranty Information
Coverage Details and Terms
Review the warranty information provided with the HY 300 Projector to understand the coverage details and terms. Familiarize yourself with the duration of coverage, exclusions, and steps for initiating warranty claims if needed.
Steps for Warranty Claims
In the event of any issues covered by the warranty, follow the manufacturer's instructions for initiating warranty claims. Provide necessary documentation and adhere to the specified procedures to expedite the resolution process.
FAQs (Frequently Asked Questions)
Common Queries and Answers
Address common queries and concerns about the HY 300 Projector in the FAQs section. Cover topics such as setup instructions, troubleshooting tips, compatibility issues, and warranty coverage to provide comprehensive support to users.
Addressing User Concerns and Misconceptions
Clarify misconceptions and alleviate user concerns about the HY 300 Projector by providing accurate information and explanations. Address common misconceptions about projector technology, performance, and maintenance to ensure users have a clear understanding.
Contacting Customer Support
Available Support Channels
Provide information about the available support channels for contacting customer support regarding the HY 300 Projector. Include options such as phone support, email assistance, online chat, and support ticket submissions for users to seek help when needed.
Tips for Efficient Support Interaction
Offer tips and recommendations for efficient support interaction when contacting customer support for assistance. Provide guidance on preparing relevant information, describing issues accurately, and following up on support inquiries for timely resolution.
Dejar un comentario
Todos los comentarios se revisan antes de su publicación.
Este sitio está protegido por hCaptcha y se aplican la Política de privacidad de hCaptcha y los Términos del servicio.